Wet-Weather Braking on Modern Wide-Rim Disc Wheels
The first wet ride after a dry summer catches most riders out. The brakes that felt sharp on Tuesday suddenly squeal on a roundabout, grab unevenly over a painted line, or take an extra split-second to slow you down. None of that means your disc brakes are faulty. Because disc brakes grip a metal rotor rather than the wheel rim, performance is identical regardless of whether your rims are carbon or alloy. However, reduced friction between pad and rotor—and between tyre and road—means your wet-weather braking technique must adapt.
Disc brakes are a real improvement over rim brakes in the rain, but being better in the wet isn't the same as being unaffected by it. The rotor still needs a moment to clear water off its surface before it grips the way it does dry, and your tyres are still the ultimate limit on how hard you can slow down without sliding. Get the technique right and a wet commute or descent is manageable. Get it wrong and you'll brake too late into a junction, or lock a wheel on a painted crossing at exactly the wrong moment.
This guide covers what actually changes in the wet, how to modulate the lever correctly, and how much extra stopping distance to plan for so you're not guessing.
Why wet braking feels different on disc brakes
The short answer: your rotor loses a fraction of a second of full bite at the start of every wet stop, and your tyres run out of grip long before your brakes run out of power.
A disc rotor in the rain carries a thin film of water and road grime across its surface. The first half-turn of the wheel after you pull the lever wipes that film off the pad's contact area, which is why the very first bite of a wet stop can feel soft or delayed compared with the second and third. Once that film clears, mechanical grip returns close to dry-condition levels. This is a pad-and-rotor issue, and it resolves within a fraction of a second of light, continuous braking. That's the whole case for feathering the lever rather than grabbing it once: a soft pulse clears the rotor faster than a single hard squeeze does.
The bigger limiter is your tyres, not your brakes. A tyre's grip on wet asphalt runs at roughly half of what it delivers dry, and on a painted line, a manhole cover, or a film of diesel it drops further still. A modern hydraulic disc brake can generate more clamping force than a wet tyre can use before it skids. So in the rain, your job shifts from "brake as hard as possible" to "brake as hard as the tyre will tolerate." That's a feel-based skill, not a strength-based one.
Reading the road before you need the brakes
Wet-weather braking starts before your hand touches the lever. Look ahead for the surfaces that lose grip fastest: painted road markings, tram or drain covers, wet leaves, the first ten minutes of rain after a dry spell (when oil and dust rise to the surface and haven't washed away yet), and shaded sections of road that stay damp long after open stretches have dried.
Where you can, plan your braking so the wheel is rolling on plain wet asphalt rather than on a hazard when you're asking for maximum deceleration. If you must brake over a painted line or a metal cover, do it lightly and finish your braking before the wheel actually crosses it.
How to Clear Water and Modulate Force
In the rain, a disc rotor carries a thin film of water that must be swept away before full braking power is restored. Dragging the pads with light, continuous pressure—rather than pumping or pulsing the levers—clears this surface film in a fraction of a second while building gentle friction heat to prevent water from instantly recoating the rotor. Once that initial contact restores bite, modulation becomes key: controlling how much force you apply and how quickly, rather than treating the lever like an on/off switch.

While a firm, decisive squeeze works efficiently in dry conditions, applying that same sudden pressure in the wet risks overwhelming the tyre’s reduced grip before traction has a chance to build; instead, ease into the lever and gradually increase pressure over half a second to maintain control.
A useful mental sequence for a wet stop:
-
Cover both levers early, well before you think you'll need them.
-
Apply light, even pressure to both brakes together rather than favouring the front.
-
Increase pressure gradually over roughly half a second rather than snapping to full force.
-
If you feel the front tyre start to lose traction (a light, vague feeling through the bar rather than a sudden slide), ease off slightly rather than releasing completely.
-
Keep your weight low and slightly back, especially on descents, so weight transfer doesn't unload the rear wheel entirely.
Front-brake bias still matters in the wet, because most of your stopping power comes from the front wheel. The change is in how you get there: progressively, not instantly.
Body position for wet braking
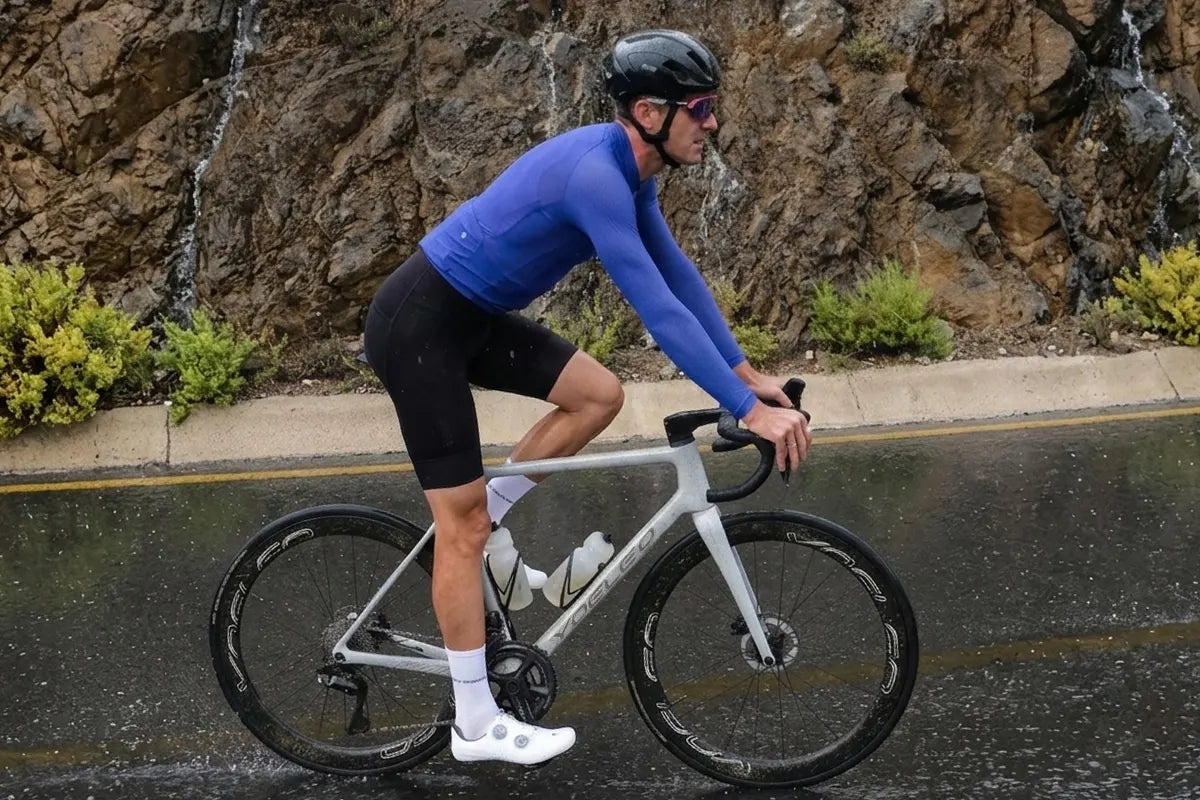
Drop your heels slightly and push your weight back and down through the saddle and handlebars. In wet conditions, the low friction limit causes tires to slide long before maximum deceleration can lift the rear wheel. Shifting your weight back helps keep the rear tyre firmly planted for auxiliary braking while preventing the front wheel from sliding out under heavy braking forces.
On a fast, wet descent, sit a little further back than you would in the dry and keep your hands in the drops, where lever reach and stopping power are both better.
What tyre and wheel choice actually change
Braking technique matters more than equipment, but equipment sets the ceiling on how much grip you have to work with. Wider internal rim widths let a tyre sit at its intended shape and volume, which increases the size of the contact patch touching the road, most useful precisely when that contact patch is your limiting factor. A wheel like the
SAT C50 DB PRO NxT SL2, built around a 23 mm internal width, is one example of a rim designed to support a wider tubeless tyre properly rather than stretching it thin over a narrow bed.
Bearing seals matter too, though less for braking itself than for keeping the whole system working after the ride. Hubs that see regular wet riding benefit from properly sealed bearings; the
QianKun CS50, for example, runs ceramic sealed bearings specifically to keep water and grit out of the hub over a wet season, which is a maintenance detail rather than a braking one, but it's part of why a wheel keeps performing consistently ride after ride in poor weather.
Stopping distance: dry, wet, and contaminated
The numbers below aren't lab data for a specific brake or tyre. They're calculated stopping distances using the standard braking-distance formula, based on typical tyre-to-road friction values for each surface condition. They exist to show the shape of the problem: wet asphalt roughly doubles a dry stopping distance, and contamination (leaves, diesel, fresh paint) can very nearly triple it, and no brake, disc or rim, changes that once the tyre is the limiting factor.
|
Surface condition
|
Approx. friction (μ)
|
Stopping distance from 30 km/h
|
Stopping distance from 40 km/h
|
|
Dry, clean asphalt
|
0.70
|
5.1 m
|
9.0 m
|
|
Wet, clean asphalt
|
0.40
|
8.8 m
|
15.7 m
|
|
Wet + contamination (leaves, paint, diesel)
|
0.25
|
14.2 m
|
25.2 m
|

These are theoretical minimums assuming the tyre is right at the edge of traction, with no reaction time added. Add your own reaction distance on top, roughly 4 metres at 30 km/h and 5.5 metres at 40 km/h for an average 0.5-second reaction, and it becomes clear why braking earlier, not harder, is the real wet-weather skill.
Worked example: 78 kg rider braking from 30 km/h on Wet Asphalt
A rider and bike weighing 78 kg total approach a junction at 30 km/h (8.3 m/s) on wet, clean asphalt. Based on a wet friction coefficient (μ=0.40), the theoretical minimum stopping distance once the brakes engage is 8.8 metres.
However, accounting for a realistic 1.0-second human reaction time under rainy conditions adds another 8.3 metres before you pull the levers. This brings the true stopping distance from recognition to a complete stop to roughly 17.1 metres—more than three car lengths.
Frequently Asked Questions
Why do my disc brakes squeal in the rain?
Squealing usually comes from water and grit vibrating between pad and rotor, not from a fault. It's most common in the first few seconds of braking as the rotor clears. If it persists once dry, check pad wear and rotor cleanliness; a squeal alone with normal stopping power isn't dangerous.
Do carbon wheels brake differently from alloy in the rain?
Disc-braking carbon wheels use the same rotor and pad system as alloy wheels, since the braking surface is the rotor, not the rim. Any difference in wet performance comes from tyre, rim width, and pad choice, not the rim material itself.
How much earlier should I brake in the rain?
As a working rule, start braking roughly twice as early as you would in the dry for the same stop. The stopping-distance table above shows why: wet asphalt alone roughly doubles minimum stopping distance before contamination is even a factor.
Is it true that disc brakes don't work as well after riding through a puddle?
Briefly, yes. A rotor that's just been submerged needs a stroke or two of light braking to wipe itself dry before it returns to full bite. Pulse the brakes gently straight after a puddle or deep spray if a junction is coming up.

Share:
Off-Season Storage: Putting a Carbon Bike Away for Three Months
Descending Technique: Body Position, Braking Points, Cornering Lines