
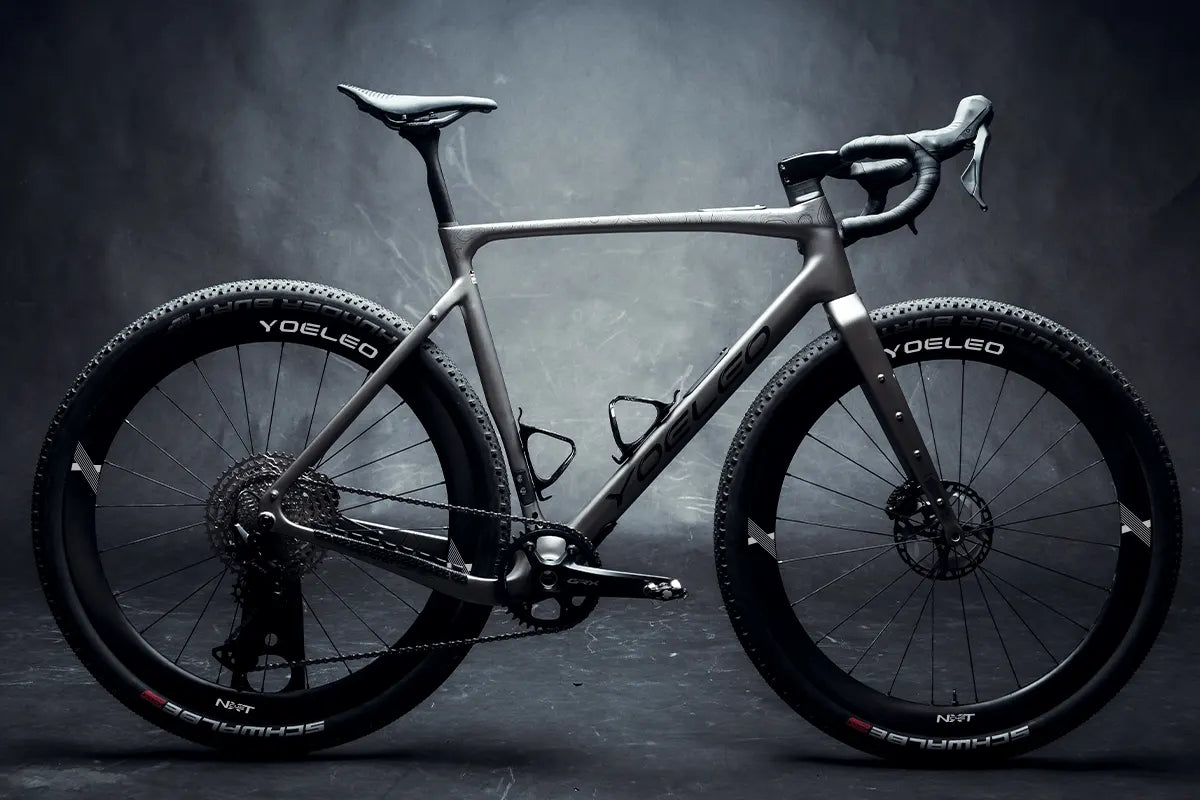
Carbon fibre does not bend before it breaks. That is its strength in aerodynamics and weight reduction, and its liability at every bolted interface on your bike. A steel stem clamp tightened ten percent over spec might creak. The same over-torque on a carbon bar can cause a latent crack that propagates over hundreds of kilometres before it fails — and carbon failures under load are sudden, not gradual.

Most carbon damage from bolts is not dramatic. It does not announce itself. It starts as micro-fracturing in the fibre matrix around a clamped surface, invisible to the eye, and grows every time that interface is loaded. The ten-minute torque habit described below is not about being precious with expensive equipment. It is about understanding the failure mode and eliminating it before it starts.
|
CARBON TORQUE IN 30 SECONDS
• Carbon has a lower crush resistance than its tensile and compressive fibre strength — over-torquing a bolt crushes the matrix between fibres, creating micro-cracks that grow over time.
• The three highest-risk interfaces on a road or gravel bike are: seatpost clamp, stem face plate, and bar-to-stem clamp. These are also the three most commonly over-tightened by riders who 'go by feel.'
• Carbon assembly paste (friction compound) is not optional — it allows correct clamping force at lower torque values, eliminating the guesswork and reducing stress on the carbon.
• A quality beam-style or click-type torque key pays for itself the first time it prevents a cracked seatpost clamp or crushed handlebar.
|
Why Carbon Fails at Bolt Interfaces
Carbon fibre composite is anisotropic — its strength depends on fibre orientation. Manufacturers design layups to carry specific loads in specific directions. A handlebar is laid up to resist bending and torsion from rider input. The clamp zone at the stem receives compressive hoop stress from the bolt — a load the fibre orientation was not primarily designed to carry.
When compressive stress at a clamp exceeds the matrix's resistance, the resin between fibres micro-fractures. This is not visible on the surface. A standard torque spec — typically 4–6 Nm for a carbon bar interface — is calculated to achieve adequate friction for slip resistance without exceeding the matrix's compressive limit. 'Feeling tight' at 8 Nm does not mean it is better; it means the damage budget is being spent.
|
SAFETY NOTE
• If you hear a creak or pop from a carbon interface after assembly, do not continue riding. Remove the component, inspect visually under bright light, and consult the manufacturer before re-installing. A creak at a carbon bolt interface can indicate micro-fracture propagation.
|
The Three Highest-Risk Interfaces
Not all bolted interfaces on a carbon bike carry the same risk profile. The three below account for the majority of preventable carbon damage.
|
Interface
|
Typical Torque Range
|
Risk Without Carbon Paste
|
Risk With Carbon Paste
|
|
Stem face plate (bar clamp)
|
4–6 Nm
|
High — riders over-tighten to prevent bar rotation
|
Moderate — paste friction lowers required torque
|
|
Seatpost clamp (frame collar)
|
4–6 Nm (varies by design)
|
High — riders tighten to stop saddle drop, especially for heavier riders
|
Low-moderate — paste allows correct clamping at spec torque
|
|
Stem-to-steerer clamp
|
5–7 Nm (varies by stem design)
|
Moderate — over-torque can crack steerer or deform stem bore
|
Low — paste ensures adequate friction at lower clamping force
|
|
Saddle rail clamp (two-bolt)
|
8–12 Nm
|
Low-moderate — saddle drop is the failure mode, not material damage
|
Low — standard for most two-bolt designs
|
|
Bar end plugs / accessory mounts
|
1–2 Nm
|
Low — but stripping is common
|
Rarely needed — check component spec sheet
|
Carbon Assembly Paste: What It Does and How to Use It
Carbon assembly paste — often called carbon friction paste or carbon grip compound — is a suspension of fine particles (typically silica or ceramic) in a carrier grease. When applied to the contact surfaces at a clamped interface, the particles embed into both surfaces and dramatically increase friction at lower clamping forces.
The practical effect: you can achieve the torque spec printed on the component (typically 4–5 Nm) and be confident the bar, post, or stem will not rotate under load. Without paste, riders often crank bolts past spec because the interface feels loose until force is applied — exactly the mechanism that generates micro-cracks.
-
Apply a thin, even film to both contact surfaces — the component and the clamp bore. More is not better; excess paste can create hydraulic pressure in a sealed bore.
-
Do not use carbon paste on threaded fasteners (bolt threads). Use anti-seize or threadlock as appropriate for the application instead.
-
Do not use standard grease as a substitute — grease reduces friction and requires higher clamping force to achieve slip resistance, defeating the purpose.
-
Reapply whenever a carbon interface is disassembled — paste is consumed in the contact zone during service.
Building the 10-Minute Torque Habit
The habit is not about checking everything every ride. It is about establishing a systematic interval — analogous to tyre pressure checks — that ensures critical interfaces are within spec before load is applied.
-
At assembly (new build or component change): torque all interfaces to spec with paste applied. Record the values in a component log if you maintain one.
-
After 200–300 km on a new setup: re-check all clamped interfaces. Carbon and alloy interfaces can settle slightly during initial loading.
-
Every 2,000–3,000 km or at seasonal service: full torque audit of stem, bar, seatpost clamp, and any accessory mounts.
-
After any crash or impact, even minor: remove and inspect clamped carbon interfaces before the next ride. Internal cracks can form without visible surface damage.
-
After travel (bike packed or shipped): vibration and handling can loosen interfaces. Check on arrival, not at the start of your first ride.
Choosing a Torque Tool
For the 2–10 Nm range that covers most carbon bike interfaces, two tool types are appropriate: beam-style torque wrenches (which show live torque on a scale as you turn) and click-type torque keys (which emit a click and release at the set value). Both work; both are far more accurate than 'snug plus a quarter turn.'
|
Tool Type
|
Accuracy
|
Best For
|
Limitation
|
|
Click-type torque key (e.g., 2–10 Nm preset or adjustable)
|
±4% typical at mid-range
|
Workshop use, regular maintenance
|
Can be over-driven past the click; needs calibration check every 2–3 years
|
|
Beam-style torque wrench
|
Accurate at all ranges when read correctly
|
Budget-friendly, long-lived, no calibration required
|
Requires correct reading angle; slower to use
|
|
Digital torque adapter
|
±2% typical
|
Precise professional use
|
Expensive; battery required
|
|
Hex key 'by feel'
|
Uncontrolled — typically 1.5–3× spec on common sizes
|
Not appropriate for carbon interfaces
|
Do not use for carbon components
|
A mid-range click-type torque key covering 2–10 Nm handles the majority of carbon bike work and is the most practical choice for most riders. Multi-bit kits with a built-in torque preset are available from Park Tool, Topeak, Feedback Sports, and others in the USD 40–80 range.
Framesets and Cockpits Designed for Torque Discipline
The benefits of torque discipline compound when the carbon itself is manufactured to tight tolerances at every clamped surface. Frame and handlebar manufacturers who invest in consistent layup thickness, precise bore dimensions, and quality surface finishes give the rider's torque tools something accurate to work against. Inconsistent wall thickness in a seatpost bore means a single torque value does not translate consistently — and that is a manufacturing variable, not a rider error.

The R11, R12, and Altera G21 framesets are built from Toray high-modulus carbon using ProMoldCore latex molding, which maintains consistent internal wall thickness across complex tube geometries. The H9, H21, and H25 handlebars are T700 ProMoldCore one-piece construction — the absence of a bond line between bar and stem eliminates one of the most common micro-fracture initiation sites on integrated cockpits. These are not abstract engineering choices; they are factors that make torque specifications meaningful rather than approximate. Pair them with proper torque discipline and carbon paste, and the risk of interface damage drops to near zero.
For frame-care guidance including storage, transport, and crash inspection, see the carbon frame care guide on the blog.
|
HOW YOELEO ENGINEERS FOR TORQUE CONFIDENCE
• ProMoldCore latex molding maintains consistent internal wall thickness — torque specs translate reliably at every interface
• R11 pedaling-fatigue tested to 100,000 cycles at 1,100N — the frame is designed to sustain repeated loading, not just survive installation
• H9/H21/H25 one-piece ProMoldCore construction eliminates the bond-line micro-fracture risk at integrated cockpit interfaces
• Six-year frameset warranty — Yoeleo stands behind the carbon under normal use and correctly applied torque
• DTC direct purchase means spec sheets, torque tables, and support are accessible without a dealer intermediary
|

Frequently Asked Questions
What torque should I use for a carbon handlebar?
Most carbon handlebar face plate bolts are specified at 4–6 Nm. Always follow the lower torque value printed on the component itself — apply carbon assembly paste to both contact surfaces first, which allows that lower torque to achieve sufficient friction for slip resistance.
Do I need carbon paste if I already have a torque wrench?
Yes. Carbon paste and a torque wrench work together, not as alternatives. Paste reduces the clamping force needed to prevent rotation; the torque wrench ensures you apply the correct force. Paste alone leaves torque uncontrolled; a torque wrench alone without paste typically requires over-torquing to achieve friction.
How do I know if I have cracked my carbon seatpost clamp?
Visible surface cracks, paint crazing around the clamp area, a new creak under load that did not exist before, or saddle height that drops even at correct torque are all warning signs. If you suspect damage, have the frame inspected before continuing to ride — internal carbon damage is not always visible externally.
Can I use regular grease instead of carbon paste?
No. Standard grease reduces friction between surfaces, requiring higher clamping force to prevent slip — the opposite of what carbon paste achieves. Use carbon-specific friction paste (silica or ceramic particle suspension) at carbon-on-carbon or carbon-on-alloy interfaces, and reserve standard grease for threaded fasteners and bearing surfaces.
Share:
Frame vs Wheels Upgrade: Which Comes First?
First Gravel Race Prep: 6-Week Training and Kit Checklist